By Raghav | |
How I Mastered Night Photography in Chennai’s Monsoon
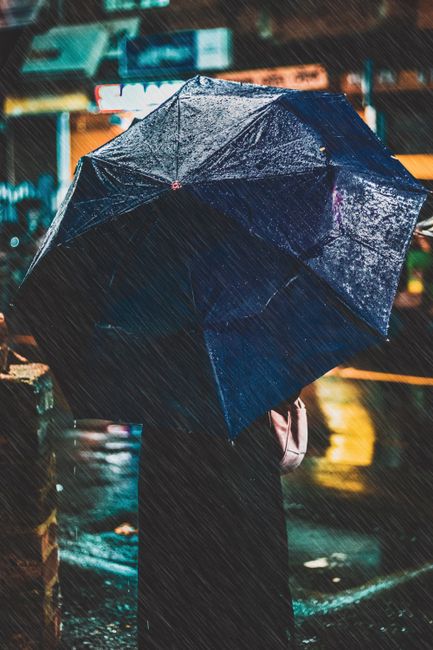
On a rainy evening in July 2023, I found myself at the iconic Marina Beach, my camera gear drenched but my spirits soaring. The dark clouds loomed overhead, and the street lights flickered with reflection on the wet sand, creating a surreal landscape. That night was one of my most memorable experiences in night photography, and it taught me invaluable lessons about capturing the beauty of Chennai during the monsoon. Here’s how I turned a challenging environment into stunning photographs and what I learned along the way.
The Challenge of Low Light
As a photographer, I’ve always been drawn to the drama of low-light situations. But navigating the challenges posed by the monsoon season in Chennai, especially at night, was a whole different ballgame. The first time I attempted night photography in the rain was in August 2021 at the bustling streets of T. Nagar. Armed with my Nikon D850 and a 24-70mm f/2.8 lens, I was determined to capture the vibrancy of street vendors and passing vehicles amidst the rain-soaked chaos.
While I was excited, I quickly realized that shooting in such poor light conditions required more than just enthusiasm. My ISO settings were all over the place. Initially, I shot at ISO 6400, thinking it would compensate for the dim light. However, the resulting images were grainy and lacked detail. It wasn’t until I dropped my ISO to 1600 and opened my aperture to f/2.8 that the night transformed into a canvas of color and light. This experience taught me to be patient and to experiment with settings rather than relying on automatic modes.
Understanding Your Gear
Investing in the right gear is essential for mastering night photography. Here’s a simple breakdown of what I use:
- Camera: Nikon D850 — it excels in low-light situations.
- Lens: Nikkor 24-70mm f/2.8 — the wide aperture helps capture maximum light.
- Tripod: Manfrotto Befree Advanced — a sturdy tripod is a must for long exposures.
During that shoot in T. Nagar, I also learned the importance of using a tripod. I had initially tried to shoot handheld, which resulted in shaky images. Using my tripod allowed me to capture longer exposures without compromising sharpness, leading to a much more satisfying result when I reviewed my shots later.
Magical Moments at the Beach
Fast forward to monsoon season in 2022, when I returned to Marina Beach, this time with more experience under my belt. As I set up my gear, I noticed how the rain created a unique atmosphere. The sound of water hitting the sand was soothing, and the reflections on the wet surface were mesmerizing. I began shooting just after sunset, when the sky was still a deep blue and the lights from the nearby stalls began to twinkle.
Using my tripod, I set the camera to a 15-second exposure at f/11 and ISO 100. The result was breathtaking — the motion of the waves blended beautifully with the colorful lights, creating a dreamlike effect. A couple, dancing in the rain, caught my eye, and I quickly adjusted my settings to capture them. I opened my aperture to f/2.8 and set the shutter speed to 1/50 second, allowing enough light to flow in while freezing their joyful moment. The final image was a perfect blend of vibrant colors and a genuine expression of love, which I later titled “Rainy Romance.”
Best Practices for Night Photography
- Use Manual Mode: This gives you control over your settings.
- Experiment with ISO: Start low to minimize noise and adjust as needed.
- Utilize Long Exposures: Capture the movement of light and water for dramatic effects.
- Bring Extra Batteries: Cold, wet weather drains battery life quickly.
Exploring the City’s Nightlife
In December 2022, I decided to venture into the heart of Chennai’s nightlife. I chose the lively area of Mylapore, known for its vibrant markets and temples. I began my shoot at the famous Kapaleeshwarar Temple, where the illuminated architecture against the night sky presented an incredible contrast. I wanted to capture the temple’s intricate carvings along with the bustling atmosphere of devotees and visitors.
With my Nikon D850 set to ISO 800, f/4, and a 10-second exposure, I captured the temple beautifully lit up. The ambient light from the surrounding shops added warmth to my images. I also tried some longer exposures of the crowd, creating a ghostly effect as people moved through the frame. The key here was to find the right balance between ambient light and the movement of the crowd, which I achieved by adjusting my shutter speed to 1/15 second for the moving subjects.
Location Tips for Night Shoots in Chennai
Here are my top picks for night photography locations in Chennai:
- Marina Beach: Best visited just after sunset. Parking is available, but arrive early to secure a spot.
- Mylapore (Kapaleeshwarar Temple): The temple is beautifully lit at night. Make sure to check for any restrictions on photography inside the temple grounds.
- T. Nagar: The bustling markets come alive at night. Parking can be tricky, so consider using public transport or ride-hailing services.
Mistakes I Made
Every photographer has a few horror stories, and I’m no exception. One of my most significant blunders happened during a monsoon shoot in July 2020 at the Chennai Marina. I was so excited to capture the rain reflecting the city lights that I neglected to protect my gear adequately. My camera got splashed, and while it still functioned, I later discovered that moisture had crept into the lens. This led to fogging and ultimately required a costly repair. From that experience, I learned two vital lessons: always carry waterproof covers for your gear and keep your equipment protected from the elements, even when the excitement of the moment is overwhelming.
What I Would Do Differently
If I had the chance to redo that day at Marina Beach, I would have been much more proactive about protection. I would have carried a rain cover for my camera and a few lens cloths to keep my lens clear of water spots. On future shoots, I also decided to invest in a weather-sealed lens to give me more peace of mind when shooting in unpredictable conditions. Preparation is key, and being ready for the unexpected can make a significant difference in the quality of your work.
Post-Processing for Night Shots
Editing is as crucial as shooting, especially for night photography. My go-to software is Adobe Lightroom, where I enhance my images to bring out the best details. For the “Rainy Romance” shot I discussed earlier, I made the following adjustments:
- Exposure: Increased by +0.5 to brighten the couple’s faces.
- Contrast: Enhanced to add depth to the image.
- Clarity: Increased by +10 to make the details pop.
- Noise Reduction: Applied to manage grain from higher ISO settings.
These adjustments helped transform good shots into great ones while maintaining the natural essence of the scene. I’ve learned to be careful with saturation; too much can ruin the authenticity of night photography, especially in the vibrant yet subtle colors of the rainy season.
Final Thoughts
Night photography during Chennai’s monsoon is both a challenge and a joy. The rain brings an ethereal quality to the city, creating opportunities for unique and striking shots. With the right gear, a good understanding of your camera settings, and a willingness to learn from mistakes, you can master this art form. Remember, the beauty of photography lies not only in capturing images but also in the stories you tell through them. So grab your camera and head out into the rain — the magic awaits!
What camera settings are best for night photography?
The best camera settings for night photography typically include a low ISO (around 100-1600), a wide aperture (f/2.8 to f/4), and a longer exposure time (5-30 seconds) depending on the available light. Always experiment to find what works best for your scene.
Is it necessary to use a tripod for night photography?
Yes, using a tripod is highly recommended for night photography as it stabilizes your camera during long exposures, preventing blurriness in your images. It allows you to experiment with longer shutter speeds without compromising sharpness.
How do I protect my camera gear during the rain?
To protect your camera gear during the rain, use waterproof covers or bags, and consider using weather-sealed lenses. Additionally, keep lens cloths handy to wipe off any moisture that may accumulate on your lens.
With over 8 years of experience in wedding, portrait, and travel photography, I specialize in capturing the essence of Chennai and Tamil Nadu. My passion lies in transforming fleeting moments into lasting memories, especially amidst the enchanting landscapes and vibrant cultures of my home.
Explore more photography tips, stories & inspiration