By Raghav | |
How I Learned Light Painting with 10 Friends in June
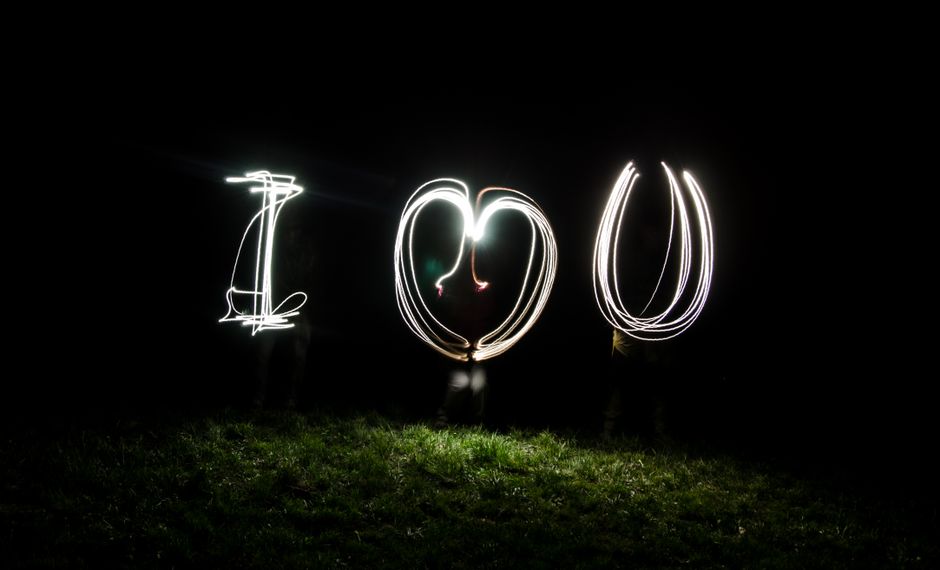
It was a humid evening in June 2023 when I gathered my closest friends for a light painting session at the VGP Universal Kingdom in Chennai. The excitement was palpable as we set up our gear, ready to explore an entirely new dimension of photography. Little did I know, this experience would be the beginning of my journey into the mesmerizing world of light painting.
The Setup: Choosing the Right Location
Before diving into the technical aspects, choosing the right location was crucial. VGP Universal Kingdom, with its vibrant colors and whimsical structures, was perfect for our light painting adventure. We arrived around 6 PM, giving us enough time to scout the area and plan our shots before the sun dipped below the horizon.
As the night fell, I quickly unpacked my gear. I used my trusted Nikon D850, paired with a 24-70mm f/2.8 lens, which I knew would handle low-light conditions exceptionally well. For light painting, a sturdy tripod is essential. I had my Manfrotto tripod ready, ensuring that my camera would stay stable during long exposures.
The First Attempt
We started with basic shapes, using LED lights and sparklers to create trails in the air. My friend Priya held a blue LED wand while I captured the scene. With a shutter speed of 10 seconds, an aperture of f/8, and ISO set to 100, we managed to create a stunning blue swirl against the backdrop of the amusement park.
As I reviewed the images on my camera, I felt a thrill of excitement. The colors popped, and the trails looked fantastic! We continued experimenting with different colors and shapes, encouraging each other to come up with creative ideas. It was during this session that I realized how collaborative light painting can be. Each friend brought their unique perspective and creativity, enriching the experience.
Exploring Techniques and Styles
As our confidence grew, we started experimenting with more intricate designs. I remembered a technique I had read about involving multiple exposures. This method added a layer of complexity and allowed for the creation of more sophisticated artworks. We decided to try it out with my friend Arjun leading the way.
Creating Layers of Light
We set up a shot with Arjun spinning a glowing hula hoop. I adjusted my camera settings to a 20-second exposure, f/11, and kept the ISO at 100. As Arjun spun the hoop, I clicked the shutter and saw the beautiful circular patterns emerge in the frame. It was mesmerizing! The combination of the hula hoop and the long exposure created a stunning effect that looked almost surreal.
After capturing a few shots, we reviewed them together. The joy of our collective success was palpable, and we couldn’t help but cheer each other on. This session taught me that light painting is as much about teamwork as it is about technical skills.
Mastering the Gear
While light painting can be done with various equipment, having the right gear makes all the difference. Over the years, I’ve learned to carry specific tools that enhance my light painting experience. Here’s what I usually bring along:
- Camera: Nikon D850
- Lens: 24-70mm f/2.8 for versatility
- Tripod: A sturdy Manfrotto tripod to prevent any shake during long exposures
- Lighting Tools: LED lights, glow sticks, and sparklers for creative effects
- Remote Shutter Release: Helps in reducing camera shake during long exposures
Editing After the Shoot
Once we wrapped up the session, I was eager to edit our shots. Using Adobe Lightroom, I adjusted the exposure and contrast to bring out the vibrant colors. For instance, one of Arjun’s shots, which was initially a bit underexposed, transformed beautifully after I increased the exposure by 1.5 stops and adjusted the white balance to enhance the blues and oranges in the frame.
This editing process taught me that the magic doesn’t just happen in-camera; it can also thrive in post-production. I recommend spending time learning editing techniques as they can significantly enhance your light painting results.
Mistakes I Made
Reflecting on my light painting journey, I realize that I’ve made my fair share of mistakes along the way. One of the biggest blunders happened during our second light painting session in July 2023 at the Marina Beach. I was so caught up in the excitement that I forgot to double-check my camera settings. I set the shutter speed to 30 seconds instead of 15 seconds while trying to capture a star trail effect. The result? A blurry mess of light and no defined shapes!
This experience taught me the importance of being meticulous with camera settings, especially in low-light conditions. Always ensure you have the right exposure settings before hitting the shutter. I’ve since developed a checklist to review settings before each shot, which has saved me from making similar mistakes.
Location Tips for Light Painting in Chennai
If you’re looking to try light painting in Chennai, here are a couple of my favorite locations along with some insider tips:
1. VGP Universal Kingdom
This amusement park offers a colorful and vibrant backdrop for light painting. The rides and structures provide unique angles and compositions. However, be mindful of the crowd during weekends. Arriving early in the evening can help you avoid the rush. Parking is ample, but ensure you check for any entry fees as they can vary.
2. Marina Beach
With its vast expanse and stunning sunsets, Marina Beach is another excellent spot for light painting. The soft sand and waves create a beautiful foreground. Make sure to visit during the weekdays to avoid the large crowds. Parking can be tricky, so consider using public transport or ride-sharing apps. Also, be cautious of the tides if you’re planning to shoot near the water!
Final Thoughts
Light painting has opened a new world of creativity for me. It’s not just about capturing an image; it’s about expressing ideas and emotions through light and movement. Each session, like the one I had with my friends, enriches my skills and broadens my artistic vision.
Whether you’re a beginner or a seasoned photographer, I encourage you to gather some friends and give light painting a try. You’ll not only create stunning images but also make lasting memories along the way. Happy shooting!
What is light painting in photography?
Light painting is a photographic technique that involves using a handheld light source to illuminate subjects while the camera’s shutter is open, creating trails of light in the image. It allows for creative expression and can result in stunning visual effects.
Do I need special equipment for light painting?
While you can start with any camera, having a DSLR or mirrorless camera with manual settings is recommended. A sturdy tripod and remote shutter release are also essential for long exposures. Additional lighting tools like LED lights or glow sticks can enhance your light painting experience.
What are the best locations for light painting in Chennai?
Some of the best locations for light painting in Chennai include VGP Universal Kingdom and Marina Beach. Both locations offer unique backdrops and ample space for creativity, but it’s recommended to visit during off-peak hours to avoid crowds.
How do I edit light painting photos?
Editing light painting photos typically involves adjusting exposure, contrast, and color balance in software like Adobe Lightroom or Photoshop. Enhancing the vibrancy of the light trails and correcting any exposure issues can significantly improve the final image.
Author Bio: I’m Raghav, a professional photographer based in Chennai with over 8 years of experience specializing in wedding, portrait, and travel photography. My journey has taken me across Tamil Nadu, capturing the beauty of our culture and moments that matter.

Explore more photography tips, stories & inspiration