By Raghav | |

How I Used Light Painting for Stunning June Nightshots
On a sultry evening in June 2023, I found myself perched on the edge of an abandoned warehouse in the heart of Chennai, armed with a Canon EOS R5 and a collection of LED lights. I had a vision: to use light painting to transform this gloomy structure into a canvas of vibrant colors. As the sun dipped below the horizon, I began to experiment with different light sources and techniques, and what unfolded was nothing short of magical.
Understanding Light Painting
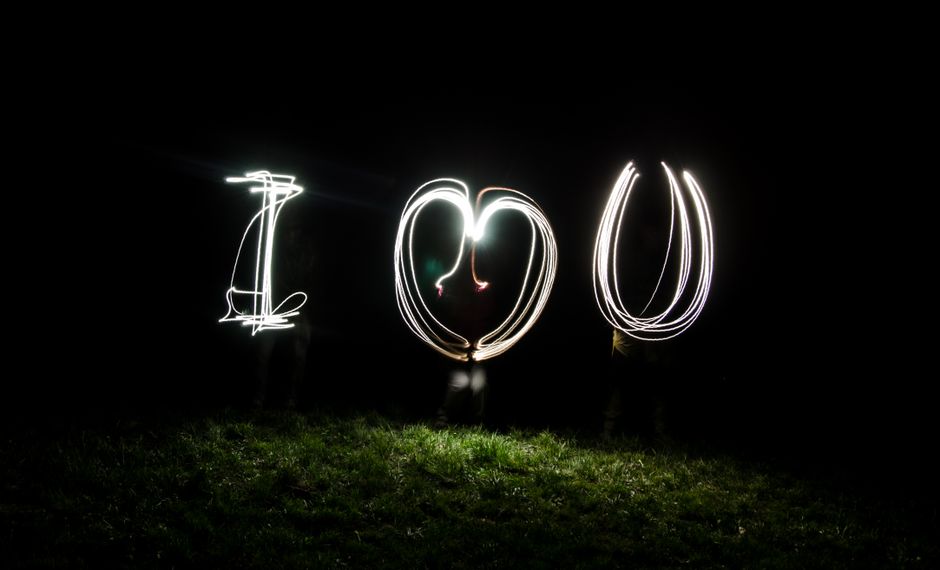
Light painting is a photography technique that involves moving a light source while taking a long exposure picture. This method can create stunning effects, from ethereal glows to intricate designs. In my journey through Tamil Nadu’s nightscapes, I’ve come to master this art, and I want to share my insights and experiences with you.
The Basics of Light Painting
Before you dive into the creative aspects, it’s crucial to understand the technical side. Here’s a quick rundown:
- Gear: I use a Canon EOS R5 with a 24-70mm f/2.8 lens. My go-to settings for light painting usually start at ISO 100, f/8, and a shutter speed of around 10-30 seconds, depending on the available ambient light.
- Light Sources: I often carry a variety of light sources, including LED flashlights, colored gels, and even sparklers for that extra flair.
- Tripod: A sturdy tripod is essential to keep the camera stable during long exposures.
My First Light Painting Experience
It was a balmy night on June 15, 2022, when I first attempted light painting at the iconic Kapaleeshwarar Temple in Mylapore. Armed with my Canon 5D Mark IV, I aimed to capture the intricate carvings and statues that adorned the temple’s facade. As the crowds dwindled, I set up my tripod and began to experiment.
With a flashlight in hand, I illuminated the temple’s gopuram, moving the light in sweeping motions. The result? A breathtaking image that highlighted the temple’s details against a starry sky. The long exposure revealed shades of orange and blue, creating a surreal atmosphere. That image marked the beginning of my fascination with light painting.
Perfecting My Technique
After that initial success, I realized I needed to refine my technique. During a night shoot at Elliot’s Beach in Besant Nagar on July 20, 2022, I decided to incorporate more colors. Using colored gels on my flashlight, I painted the shoreline while capturing the waves crashing against the rocks. The combination of the ocean’s motion and the vibrant colors created an enchanting scene that I would later edit in Adobe Lightroom, adjusting the contrast and saturation to enhance the overall effect.
In post-processing, I typically increase the vibrance while keeping an eye on the shadows to maintain depth. The final image was a blend of blues and purples, reminiscent of a dreamy seaside escape.
Locations for Light Painting in Chennai
Chennai offers a plethora of locations perfect for light painting. Here are my top recommendations based on hands-on experience:
1. Marina Beach
Marina Beach is a must-visit for night photography. The expansive shoreline provides a stunning backdrop, and the absence of crowds in the late hours makes it ideal for light painting. I recommend visiting around 10 PM when the moonlight adds an extra dimension to your shots. Just be cautious of the tides, as they can come in quickly. Parking near the entrance is available, but arrive early to secure a spot.
2. Fort St. George
Fort St. George is another fantastic spot, steeped in history and charm. The colonial architecture provides a striking contrast to colorful light painting. I shot there last August, and the results were phenomenal. I suggest going around 9 PM for minimal foot traffic and to capture the fort under the softly lit streetlamps. Parking is limited, so consider taking a cab or bike if you can.
Mistakes I Made
No journey is without its pitfalls, and my light painting adventures are no exception. One of the biggest mistakes I made was during a shoot at the San Thome Basilica in September 2022. I arrived unprepared, forgetting to bring extra batteries for my LED lights. As I was getting into the groove, my light source died, leaving me scrambling for an alternative.
The lesson? Always double-check your gear before heading out, especially when you’re experimenting with new techniques. Now, I have a checklist that ensures I never leave home without extra batteries, a backup light source, and a fully charged camera.
Editing Your Light Paintings
Once you’ve captured your light painting images, the next step is editing to enhance the final product. I primarily use Adobe Lightroom for my edits. Here’s a brief workflow I follow:
- Import: Start by importing your images into Lightroom.
- Basic Adjustments: Adjust exposure, contrast, and highlights. For my Marina Beach shot, I increased the shadows to reveal more detail in the foreground.
- Color Grading: Play with the HSL sliders to enhance specific colors. For that beach photo, I bumped up the blues and purples while toning down the yellows.
- Sharpening and Noise Reduction: Use these tools to ensure your image is crisp but smooth.
On the technical side, I usually shoot in RAW format, which gives me greater flexibility in post-processing. This allows me to recover details and fine-tune the colors without losing quality.
Final Thoughts on Light Painting
Light painting has transformed my approach to night photography and opened up a world of creativity. The vibrant, dynamic images I’ve created have added a unique flair to my portfolio. Whether you’re an amateur or a seasoned pro, I encourage you to give this technique a shot. Remember to experiment, learn from your mistakes, and most importantly, have fun with it!
What gear do I need for light painting?
For light painting, you’ll want a camera that allows for long exposure, like a DSLR or mirrorless. A sturdy tripod is essential to prevent camera shake. Additional gear includes various light sources, such as LED flashlights or glow sticks, and colored gels for creative effects.
What are the best locations for light painting in Chennai?
Some of the best locations in Chennai for light painting include Marina Beach for its open space and Fort St. George for its historical backdrop. Both locations offer unique opportunities for creative night photography, especially when there are fewer people around.
How do I edit light painting photos?
Editing light painting photos typically involves adjusting exposure and contrast in software like Adobe Lightroom. It’s also helpful to enhance colors using the HSL sliders and to apply sharpening and noise reduction to achieve a polished look.
What mistakes should I avoid in light painting?
Common mistakes include forgetting extra batteries for your lights, not checking your camera settings beforehand, and underestimating ambient light conditions. Always be prepared and take time to plan your shoot to avoid these pitfalls.
I’m Raghav, a professional photographer based in Chennai with over 8 years of experience specializing in wedding, portrait, and travel photography. My journey through Tamil Nadu has allowed me to explore the beauty of light in unique ways, including techniques like light painting.
Explore more photography tips, stories & inspiration