By Raghav | |

What I Learned From 5 Sunrise Shoots in July 2026
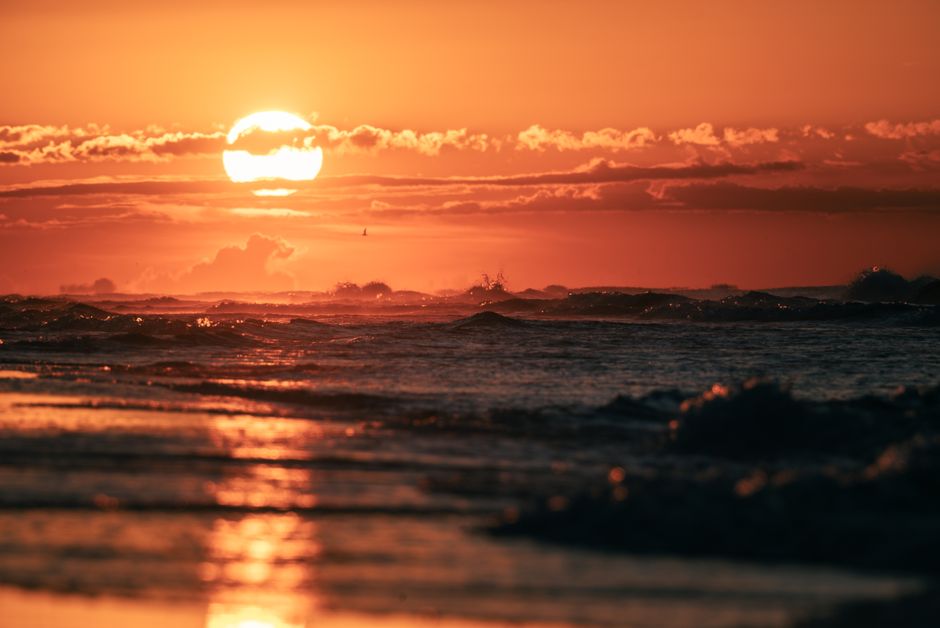
On July 5, 2026, I found myself perched on a rocky ledge at the edge of Besant Nagar Beach, my camera ready, heart racing as the first rays of the sun began to pierce the horizon. In my eight years of experience as a photographer, I had seen plenty of sunrises, but there was something magical about this particular morning. The colors that unfolded were a vivid blend of orange, pink, and gold, washing over the waves in a way that made every ounce of effort worthwhile. However, capturing those fleeting moments taught me lessons that I carry with me every time I set my alarm for an early shoot.
Over the course of July, I embarked on five sunrise shoots in different locations around Tamil Nadu. Each shoot brought its own set of challenges, discoveries, and, most importantly, insights that can only be gained through experience. Here’s what I learned from those early mornings.
1. The Importance of Location and Timing
Choosing the right location is paramount, but so is timing. For my second shoot on July 10, I decided to venture to Mahabalipuram, known for its stunning rock formations and ancient temples. I arrived at 4:30 AM, the dawn chorus of birds mingling with the sound of waves crashing against the shore. I wanted to capture the sun rising behind the Shore Temple, a UNESCO World Heritage site. The trick with this location is not just the view but getting the angle right.
After a short trek along the beach, I found the perfect spot. I set my Nikon D850 on a tripod, using a 24-70mm lens. The settings were f/11, ISO 100, and a shutter speed of 1/60 seconds. As the sun began to rise, the temple silhouette became sharper, and the colors of the sky deepened. However, I realized that I had miscalculated the exact moment when the sun would peek over the horizon. I missed a few shots as I adjusted my settings. A quick tip: always scout the location at least a day in advance if you can, and use an app like PhotoPills to understand the sun’s path.
2. Gear Matters, But So Does Preparation
On July 12, I chose the quieter Kanyakumari for its breathtaking views where the sunrise can be seen meeting the sea from the southernmost tip of India. I packed my gear meticulously — a Canon EOS R5, a 16-35mm lens, extra batteries, and a polarizing filter. However, my excitement led to a critical oversight: I forgot to charge my spare battery. When I arrived, I realized I had only a limited time to shoot before needing to switch batteries. Lesson learned: preparation goes beyond packing gear; it includes ensuring everything is charged and functioning.
The sunrise at Kanyakumari was a spectacle. With the sun rising over the Vivekananda Rock Memorial, I was able to use a long exposure (f/8, ISO 200, and a shutter speed of 1/30 seconds) to capture the soft waves lapping at the shore. The polarizing filter helped to enhance the colors and reduce glare, making the scene pop. When I got home, I realized how the slight mistake of not having a fully charged battery could have cost me some priceless shots.
3. The Role of Patience and Adaptability
My third shoot on July 14 took me back to Chennai, specifically to the serene waters of the Theosophical Society. The plan was to capture the sun rising over the sprawling banyan trees, creating a magical atmosphere. I arrived early, but as fate would have it, a thick fog rolled in. At first, I was frustrated. I had envisioned bright, clear skies, and instead, I was facing a gray wall of mist.
But then I remembered a piece of advice I once received from a fellow photographer: “Embrace the unexpected.” I adjusted my approach. Instead of wide landscape shots, I focused on the details — the dew on the leaves, the silhouettes of the trees, and the soft, diffused light created by the fog. I switched to my 50mm lens, shooting at f/1.8 to create a shallow depth of field. The fog added a mysterious quality to the images that I hadn’t anticipated. The final shots were ethereal, with soft lines and a dream-like quality, proving that sometimes the best images come from adapting to the situation at hand.
4. Post-Processing: The Final Touch
After all the early mornings and the challenges faced, the work didn’t stop when I put the camera down. I spent time in Adobe Lightroom editing the photos from each shoot. On July 15, I dedicated a few hours to fine-tuning the images from Mahabalipuram. I had taken one shot at f/11, ISO 100, and 1/60 seconds, but after editing, I realized how important post-processing is to bring out the vibrancy of the colors. With a bit of contrast adjustment, saturation tweaks, and sharpening, the image transformed into something that felt alive.
For anyone just starting out, remember that great shots often require a bit of love in post-production. Don’t be afraid to explore different editing styles and find what resonates with your vision. Just ensure that you maintain the integrity of the moment you captured.
Mistakes I Made
Every shoot carries the potential for mistakes, and here are a few I encountered during my sunrise adventures:
- Not Having a Backup Plan: On July 8, I planned to shoot at the Marina Beach, but the sky was overcast. I had no backup location in mind. As a result, I wasted precious time and missed the sunrise altogether. Always have alternate spots ready to go, especially for unpredictable weather.
- Ignoring the Weather Apps: I tend to rely on my instincts when it comes to the weather. On one occasion in Kanyakumari, I didn’t check the forecast and got caught in a drizzle, which ruined the shoot. Always check the weather and plan accordingly.
- Too Many Settings Changes: During the Mahabalipuram shoot, I kept fiddling with my settings instead of trusting the exposure I had initially set. This led to missed opportunities and a bit of frustration. Sometimes, it’s best to stick with your first instinct and adjust slowly.
Chennai Location Tips for Sunrise Shoots
If you’re planning a sunrise shoot in Chennai or the surrounding areas, here are some of my go-to locations and tips:
1. Besant Nagar Beach
One of the more popular spots, it offers a beautiful view of the horizon. Arrive early to find parking, which can get crowded on weekends. Aim for a shoot around 5:30 AM to catch the best light.
2. Theosophical Society
This location offers a unique mix of natural beauty and tranquility. Parking is available, but you may need to pay a small fee. The best time to shoot is just before dawn, around 5:00 AM. The large banyan trees create dramatic silhouettes against the rising sun.
3. Mahabalipuram
Perfect for those willing to travel a bit. The shoreline offers stunning views, and the ancient temples provide fantastic foregrounds. Arrive by 4:30 AM to scout your positions, and remember to bring a tripod. It’s about a 60-minute drive from Chennai, so plan accordingly.
Conclusion
Looking back on my five sunrise shoots this July, I realize that each experience was invaluable in shaping my approach to photography. From understanding the importance of timing and location to embracing the unexpected and honing my editing skills, every shoot brought its lessons. Sunrise shoots can be challenging, but they also offer some of the most breathtaking moments if you’re willing to wake up early and put in the effort.
As you embark on your own photography journey, remember that each mistake is a stepping stone, and every moment is an opportunity to learn and improve. So, grab your gear, set your alarm, and chase those sunrises!
What is the best time to shoot sunrise in Chennai?
The best time to shoot sunrise in Chennai typically ranges from 5:15 AM to 5:45 AM, depending on the season. Arriving at least 30 minutes prior allows you to set up and capture the different phases of light leading up to the sunrise.
What gear do I need for sunrise photography?
A good camera, a sturdy tripod, and a lens with a wide aperture are essential. A polarizing filter can help enhance colors and reduce glare from water surfaces. Don’t forget extra batteries and memory cards!
How do I edit my sunrise photos?
When editing sunrise photos, focus on enhancing the colors and contrast. Use software like Adobe Lightroom to adjust exposure, shadows, and highlights. Experiment with saturation to make the colors pop, but keep the edits natural.
I’m Raghav, a professional photographer based in Chennai, specializing in wedding, portrait, and travel photography with over eight years of experience capturing the beautiful moments across Tamil Nadu.
Explore more photography tips, stories & inspiration