By Raghav | |
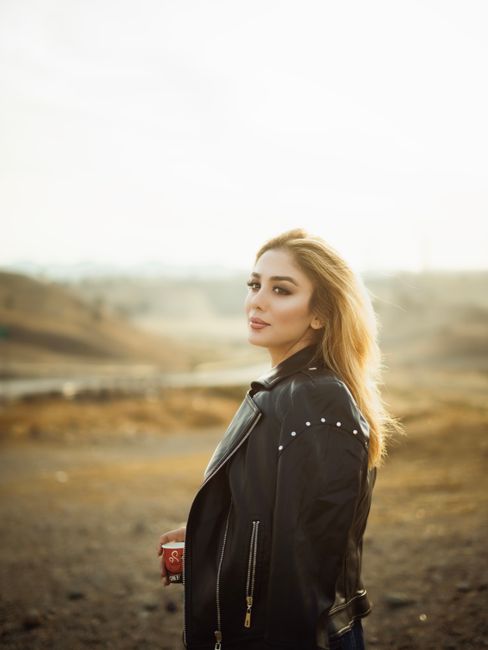
How I Took 100 Portraits in July’s Golden Hour Light
On July 15, 2023, I found myself perched on a rocky outcrop at Besant Nagar Beach, squinting at the horizon as the sun dipped slowly into the Arabian Sea. I had committed to capturing 100 portraits during the golden hour, a challenge that tested my creativity and planning skills. The golden hour, that magical time shortly before sunset, offers a warm, diffused light that enhances skin tones and adds a touch of magic to every shot. However, it also demands precision and a bit of luck. Here’s how I managed to pull it off and the lessons I learned along the way.
Planning the Shoot: The Art of Timing
When you’re shooting portraits in natural light, timing is everything. I had my eye on the clock, knowing that the golden hour varies throughout the month. On that particular Saturday, I planned to start shooting around 6 PM, giving me about an hour until the sun fully set. I had already scouted the location and decided to use a mix of backlighting and side lighting to create depth in the portraits.
Location Scouting
Besant Nagar Beach is a fantastic spot for this kind of shoot, but the key is to arrive early. I got there at 5 PM to set up and assess the light conditions. Parking can be tricky during weekends, so I parked at the nearby Elliot’s Beach, which is less crowded and only a short walk away. This allowed me to avoid the chaotic parking scene at Besant Nagar.
Once I arrived, I found the perfect spot on the rocks where the sun would cast a beautiful golden hue on my subjects. I set up my Nikon D850 with a 50mm f/1.8 lens, knowing this combination would give me that creamy bokeh I love for portraits.
The Shoot: Managing Time and Subjects
Once the clock struck 6 PM, I had my first subject, Priya, a friend from college. She was a natural in front of the camera, which eased my nerves. Using a shutter speed of 1/200s, an aperture of f/2.8, and ISO 200, I was able to capture the soft light reflecting off her hair and skin. The first few shots were warm and inviting, and I felt like I was off to a great start.
By 6:15 PM, I had already taken 20 portraits, and I was rolling with confidence. But this was just the beginning. I had lined up a total of eight models, each with their unique style and personality. I wanted to capture that diversity, so I had chosen individuals from different backgrounds and professions.
Next up was Ramesh, a local artist. I asked him to bring along some of his paintings for the shoot. The vibrant colors of his artwork contrasted beautifully with the warm golden light, creating a stunning backdrop. I adjusted my settings slightly to a shutter speed of 1/160s and kept the aperture at f/2.8 to ensure that both him and his paintings were in focus. The result was a striking portrait that spoke volumes about his passion.
Building Momentum
As the sun continued to sink, I had a rhythm going. I was capturing portraits at a steady pace, adjusting settings as needed. I was also mindful of my subjects’ comfort. I made sure to engage with them, asking about their interests and backgrounds, which helped me capture more authentic expressions.
At around 6:45 PM, I had just finished with my sixth subject, Aditi, a dancer. We took a few shots where she struck different poses, and I played with the aperture settings to create that dreamy bokeh effect. I switched to a wider aperture of f/1.8 to isolate her against the background, which really made her stand out. However, with the sun disappearing quickly, I couldn’t linger too long.
Post-Shoot: The Editing Process
After wrapping up the shoot, I returned home, eager to see how the images turned out. I imported the RAW files into Adobe Lightroom, where I spent the next few hours editing. The key was to maintain the warmth of the golden hour while enhancing the vibrancy of colors. I typically bump up the exposure slightly, around +0.5, and increase contrast to make the subjects pop against the soft background.
For Priya’s portrait, the before and after edit was striking. In the original, her skin tone looked a bit flat, so I adjusted the HSL sliders, boosting the oranges and yellows to give her a sun-kissed glow. The final image was a warm, inviting portrait that showcased the beauty of that golden hour light.
Mistakes I Made: Learning from Experience
No shoot is without its hiccups, and this one was no exception. One of the biggest mistakes I made was underestimating the time it would take to set up between subjects. I had initially planned to shoot each model for about 10-15 minutes, but in reality, I spent too long adjusting my settings and finding the right angles. By the time I got to my last two subjects, the light was fading fast, and I had to rush through their portraits.
What I learned from this is to plan better. I should have allocated more time for each subject and perhaps even had a second assistant to help manage the logistics. In future shoots, I’ll aim for a more structured timeline, allowing for a buffer to adjust and experiment with different poses and lighting setups.
Chennai Location Guide: Best Spots for Golden Hour Portraits
Having shot extensively in Chennai, I can confidently say that there are several locations perfect for golden hour portraits. Here are a couple of my favorites:
1. Theosophical Society, Adyar
This lush, green space is an oasis in the heart of the city. The sprawling gardens and ancient trees provide a stunning backdrop, especially during the golden hour. Parking is available on-site, but it can fill up quickly, so arriving early is advisable. The soft light filtering through the trees creates a magical atmosphere for portraits.
2. Mahabalipuram Shore Temple
Located about an hour from Chennai, this UNESCO World Heritage site is breathtaking at sunset. The silhouette of the temple against the setting sun is iconic. However, do check if you need any permissions for photography, especially if you’re planning to shoot with a tripod. The golden hour here is a treat, but be prepared for crowds, especially on weekends.
Conclusion
Shooting 100 portraits during the golden hour was both a challenge and a rewarding experience. The key takeaway was the importance of planning and timing, not just for the shoot but also in the editing phase. Each portrait tells a unique story, and the golden hour light adds an enchanting quality that elevates those stories. If you’re looking to capture stunning portraits, don’t shy away from experimenting with different locations and subjects during that magical time of day. With practice and patience, you’ll be able to create your own portfolio of beautiful golden hour portraits.
What is the golden hour and why is it important for portraits?
The golden hour refers to the time shortly after sunrise or before sunset when the light is soft and warm. This lighting is flattering for portraits, enhancing skin tones and creating a magical atmosphere.
How do I prepare for a portrait shoot during the golden hour?
Preparation involves scouting the location ahead of time, checking the sunset schedule, and planning your shoot around the best light conditions. Arriving early allows you to set up and adjust your settings to maximize the available light.
What camera settings should I use for golden hour portraits?
A good starting point is to use a wide aperture (f/1.8 to f/2.8) for a shallow depth of field, a shutter speed of at least 1/160s to avoid motion blur, and an ISO of around 200 to maintain image quality.
Are there specific locations in Chennai for golden hour photography?
Yes, locations like Besant Nagar Beach and the Theosophical Society in Adyar are great for golden hour portraits. Each location offers unique backdrops that enhance the beauty of the golden hour light.
I’m Raghav, a professional photographer based in Chennai. With over 8 years of experience in wedding, portrait, and travel photography, I specialize in capturing the essence of moments across Tamil Nadu.
Explore more photography tips, stories & inspiration